Flush-mountable SONICA® ultrasonic cleaners series iETH, iEP models
Submitted by soltec-admin on Fri, 10/01/2010 - 19:19
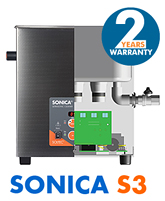
The flush-mountable versions of SONICA® ultrasonic cleaning units have been specially designed to be built into an already-existing work surface (for example a laboratory bench or sterilisation room). For the correct usage please read carefully the instruction manual of this special version of ultrasonic cleaner included with the product (warnings and advice, electrical connection, installation, operating instructions, etc.).
How is realized a Flush-mountable SONICA® ultrasonic cleaners for dental clinics ?

The unit must be flush-mounted and installed on the work surface by skilled technicians. Check that there is sufficient ventilation inside the bench or work surface
where the unit is to be installed and that there are no sources of heat or humidity.
The unit must be mounted and installed exactly as the manufacturer supplies it.
Under no circumstances must the control panel or parts of it be removed or separated since this would jeopardise the electrical safety and functioning of the unit.
How to install the unit correctly (Notes for the installer)

1. Cut out the work surface following the shape and measurements of the design supplied with the unit.
2. Insert the unit inside the
flush-mounting housing and seal the outer steel rim with the silicone or equivalent sealing product.
3. Check that the entire rim is perfectly sealed to the work surface in order to prevent any liquid infiltrations that might
damage the structure of the bench surface
and the unit.
4. Connect the drainage tube and
turn off the tap.
5. Connect the supply lead to the unit and then the plug to the electric socket.
6. Before switching on the unit, pour water and the washing liquid into the stainless steel tank until a maximum level of 3 cm from
the upper edge of the tank taking care not to wet the control panel and not to spill liquid outside the tank.
7. Proceed with switching on the unit following the operating instructions described in the chapters referring to the supplied version (ETH – EP).
8. Use the drainage tube to empty the tank and pour the liquid into a container suitable for this operation.

